


Growing Lettuce in a Sterilite Tote
Kratky Hydroponics

What happens when the lights go out?
If you have found me and this article, you have probably been researching Hydroponics already, maybe even read my other article: Hydroponics, Something old Something new. I’m not going to dwell on what it is or any of that here. You already know the key benefits of hydroponics; pest control, ease of care, and is its water efficiency. Compared to traditional soil-based agriculture, hydroponics uses significantly less water because it recirculates the nutrient solution, minimizing wastage. This makes hydroponics an environmentally friendly choice, particularly in regions with water scarcity or drought conditions.
When we setup the green house, it only had one electric outlet that I was already using for my hydroponic rack and a fan to circulate the air in the green house to keep it from getting too hot. The more I researched hydroponics the more I fell in love with it. I was not in love with the idea of having a lot of electricity running around a lot of water. I wanted to scale up my hydroponic growing to include more than just basil.
I looked into building an NFT myself, I didn’t want to shell out almost two hundred dollars every time I wanted to expand; and I started playing with the idea of solar water pumps. I used them to help irrigate some of my raised beds around our pool/pond and thought for about three days it may be a good alternative. Sun powered irrigation can be unreliable.
I had a quandary, if I can’t power my system my plants will starve. Then I stumbled across a PowerPoint presentation from Cornell University titled Kratky Hydroponic Gardening Effects of Natural vs. LED Plant Light, Container Type & Seed Propagation/ Plant Support Media on Plant Growth. That PowerPoint changed my life.
A New Hero
I started to deep dive into the then scarce and well-hidden websites that were out there about the Kratky Method of hydroponics and thought to myself after a few days of research “is this really it. Is it really that easy?” I spent weeks researching hydroponic growing, watched hours of YouTube videos before I took the plunge and spent in total on my first hydroponic setup just over $175.00, I felt robbed. Swindled even. With the Kratky method I was looking at a $35.00 setup. I was seriously mad at myself for not researching more before starting my rack NFT system.
Kratky method was developed by my new hero, a professor at the university of Hawaii, Bernard Kratky. Bernard was looking for an ecologically sound method of growing hydroponically for peoples who could be in areas where traditional hydroponics were not feasible, either they didn’t have the resources, or the finances, or the space.
The Kratky Method is a passive growing method – set it and forget it. There are no air stones, no pumps to recirculate the water, no electricity at all, no complicated gravity fed setups or wicks; it is a bucket full of nutrients with a lid that has a hole in it.
How did I Kratky?
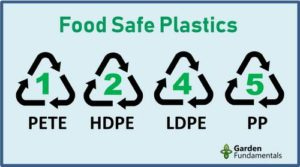
We started out using a 27-gallon Sterilite tub that I had in my garage as a proof of concept after I checked the recycle stamp to make sure it was food safe. You can absolutely use Sterilite tubs. Kratky is seriously low tech.
We used the gray totes, because it blocks the light that would encourage algae to grow inside the tote. That is very important you do not want to use anything clear. Anything water related has the opportunity to grow algae, too many algae will kill your plants. You do not have to worry about them deoxygenating the water like in some systems, but they will steal the nutrients from the water, and your PH levels will become unbalanced possibly kicking off an anaerobic process due to root rot.
I decided I would follow in Cornell University’s footsteps and do lettuce, Black Seeded Simpson Lettuce. On my lid I used a 1 7/8th inch drill bit to make the holes. It is the perfect size for a 2-inch net pot to fit snuggly.


I started my seeds in soil in a nursery tray and when they are big enough, have their first true leaves and the roots are sticking out the bottom, I transplant them into the net pot with some expanded clay pellets for support. I always loose one or two, but that’s ok. I can only at so much lettuce.
The Kratky Method is fantastic for leafy greens, lettuce, spinach. I tried Kohlrabi, it worked really well, but I think I need a larger net to really get a good yield. Right now, while I’m writing this article, I am trying Broccoli. I have six very nice shoots growing.
I have three buckets in total now and I practice a staged planting plan – each bucket reached maturity at different times, so starting early spring, all summer and into early winter we have lettuce growing.
How does it work?
Kratky works by holding the plant suspended in a fixed point above the water. When you first start your plant, you want to make sure that the water level of your jar or tote is just touching the bottom of your net-pot. some growers will say the bottom 1/8th at least should be submerged, but I like to make sure that my roots are hanging out the bottom of the pot. some people will direct sow into their systems, I would rather start and transplant. Experiment and find which works best for you.
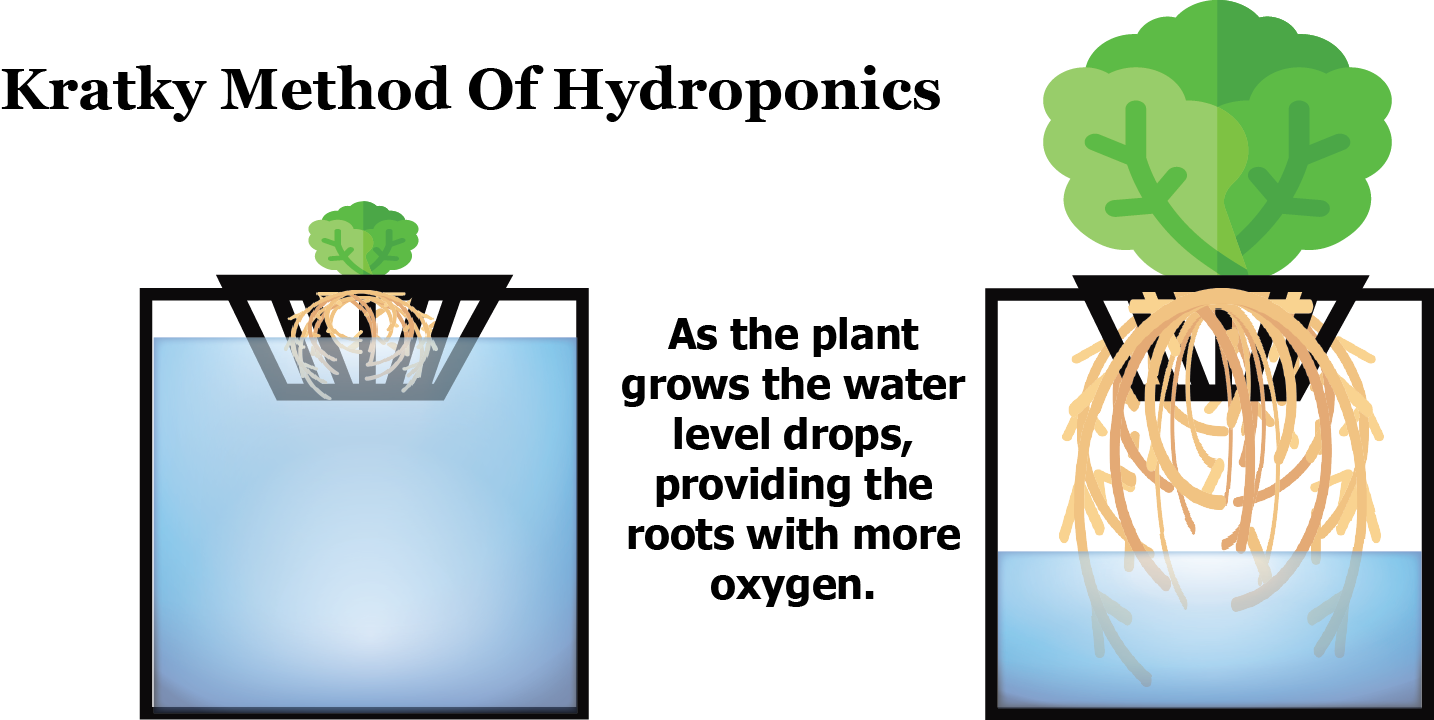
The roots will continue to take up the nutrients and grow down, while it grows down the water level in your container will drop exposing the root system to the air. Roots exposed to the air will grow tiny little oxygen breathing hairs that will take in oxygen that the plant needs. this is why you do not need air stones or circulating water.
You can grow about anything except root vegetables. Last winter I found these lids that will convert any wide mouth mason jar into a Kratky grow system. I tried to grow a parsnip last in a Mason Jar (see how it turned out) and all I ended up with was a harry root.

Nutrient Mix
How much do I use? This is really based on what you decide to grow and what nutrient mix you use. Since you do not change the water through the growth cycle of the plan you have to make sure you have your nutrient solution completely available for the entire grow cycle. You will not burn out your root system if you are worried about that. This is where gardening gets a little tricky and you start to feel like you need a chemistry degree to get it right, but you don’t. Some gardeners and hard-core growers will mix their own nutrient solutions from the various components but there are a lot of good pre-mixed solutions out there you can use. Pretty much anything that is water soluble, even compost tea if your luck to have a really good composting system.
If you want to go the route of mixing yourself, leafy greens, such as lettuce, spinach, kale, and Swiss chard, have specific nutrient requirements that differ slightly from other crops.
Nitrogen (N): Leafy greens require a relatively high amount of nitrogen for healthy leaf development. Aim for a nitrogen-to-potassium ratio of around 3:1 or 4:1.
Phosphorus (P): A lower P-to-N ratio is ideal. A ratio of 1:3 or 1:4 for phosphorus to nitrogen is generally suitable.
Potassium (K): Potassium is essential for overall plant health and disease resistance. Aim for a balanced potassium-to-nitrogen ratio, such as 1:1 or 1:2.
Calcium (Ca) and Magnesium (Mg): These secondary nutrients are vital for leafy greens. Maintain a calcium-to-magnesium ratio of approximately 3:1 to 4:1. Ensuring sufficient calcium helps prevent disorders like tip burn in lettuce.
Trace Elements: In addition to the primary macronutrients (N, P, K) and secondary nutrients (Ca, Mg), leafy greens also require various micronutrients, including iron (Fe), manganese (Mn), zinc (Zn), copper (Cu), boron (B), and molybdenum (Mo).
pH: Maintain the pH of your nutrient solution in the range of 5.5 to 6.5. Leafy greens generally prefer a slightly acidic to neutral pH environment for optimal nutrient uptake.
I personally just like using the pre-balanced mix that I dilute into my water. I don’t even filter my water or use a TDS meter on it. I think I’ve explained before, I work a full-time job, so I am looking for ease of setup and management for maximum yield. You may have to look around, but again depending on what you are growing and what that plant needs you will adjust your nutrient solution to match.
Find a nutrient solution that is crafted for the ‘vegetative’ stage (like Fox Farm Cultivation Nation®). These usually have a relatively balanced NPK ratio (nitrogen, phosphorus, and potassium,). Your plants can be kept on this mix from seed to harvest which is perfect for the Kratky set it and forget it process. I use MaxiGro™ which is relatively inexpensive by comparison for the amount you get and use; and I add in a pinch of Epson Salts just to help boost the magnesium.
I mix for three weeks' worth of feedings, 3 weeks per gallon. I have found that it is a good balance, the plant has all the nutrients it needs for our cycle. When you figure out your amounts, mix into warm water to help it dissolve.
If you find your plants are taking up the nutrients/water too quickly, you can always add more, just be sure not to completely fill your container. You must leave about 2 inches of headspace for those oxygenating roots. If you completely refill your jar, you can drown your plant and cause root rot when those oxygenating roots begin to die back. Your roots should be nice and bright, if they are turning brown, they are dying off.


Once your plants are done, they would have taken the majority of the nutrients out of the water, but you can use that water for your other plants. I wouldn’t reuse that water for a new growth cycle. Some people do, like sourdough starter they just keep refreshing it.
It Really Is That Simple, some final thoughts.
That’s the Kratky method. It may take some experimentation. It is best for leafy greens, you can grow fruiting plants (squash, tomatoes) but they are long growers and will require you refill your reservoir depending on the size you start with.
If you have your bucket outside in the warmer weather, you need to be careful of mosquitoes. If they have access, they will lay eggs in nutrient water. Another reason to not have long season plants growing. I did grow Kohlrabi in a tote, and it worked really well, the globes were larger than my in-ground plants so I will continue to grow them hydroponically, but I also included a six-dollar solar water fountain pump about three inches below the water level. I did this to keep the water agitated and to deter the mosquitoes. That seemed to do the trick.
If you do get other pests, gnats etc. flying around you can give your bucket a light dusting of Diatomaceous earth. There is a great article with more information here.
If you liked this article, check out our other content and don’t forget to subscribe for to keep up on new articles. You can also follow us on Rumble to see our progress at FatMommaFarms on Rumble. We want you to tell us about your garden journey below.